Our featured locomotive type this time will be UP's 2-8-8-0 "Bull Moose" steam locos, which served as helpers out of Victorville. Then we'll look at recent progress in moving the layout sections a bit to align them better with each other, and putting plywood squares under the footpads of the layout's legs.
During 1918-1924 the Union Pacific acquired 70 steam locos with a 2-8-8-0 wheel arrangement, and they called them "Bull Moose" locos. These were initially compound locos, with larger, low-pressure cylinders in the front, and were numbered 3600-3669. Here's a UP color photo of #3646 on Sherman Hill in the early 1940's:

But during 1937-1944 they were gradually converted to simple 2-8-8-0 locos (with the same-size cylinders front and rear) to improve their speed a little, and they were renumbered 3500-3569 as each was converted. So by 1946, when my modeled time period begins, they were all simple 2-8-8-0s in the 3500 series.
Some of them worked mainly as helpers on Cajon Pass, so they were commonly seen in Victorville, which was the westward helper base for Cajon Pass.
Here we see a Frank Peterson photo (sorry for the low-res image, but this is in Victorville) of #3555 helping an early 4-6-6-4 Challenger westbound past the water tanks in Victorville with a freight train in 1945:

Here's the same loco waiting as a helper at Summit in 1946:

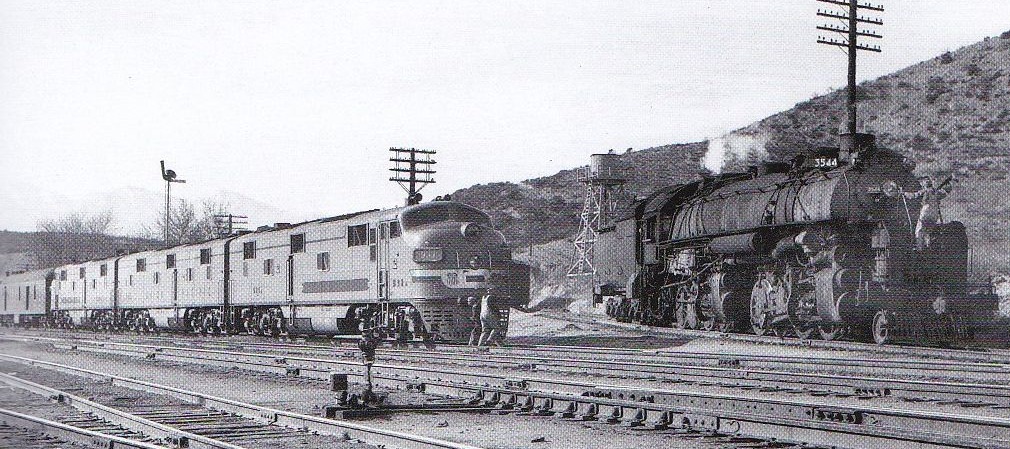
Here we see #3544 at Summit after it has helped a UP set of E7s with an eastbound passenger train in 1946 (another Frank Peterson photo):
Here Frank Peterson is following #3544 as it runs light from Summit down to Victorville in 1946, where it will get another helper assignment:

Finally, here we see a great Donald Duke photo of #3559 as it helps a westbound UP passenger train upgrade out of the Upper Narrows of Victorville in 1945:

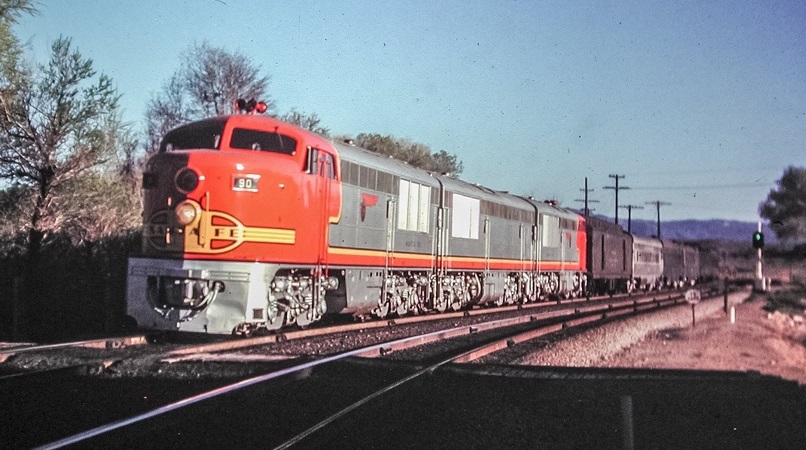
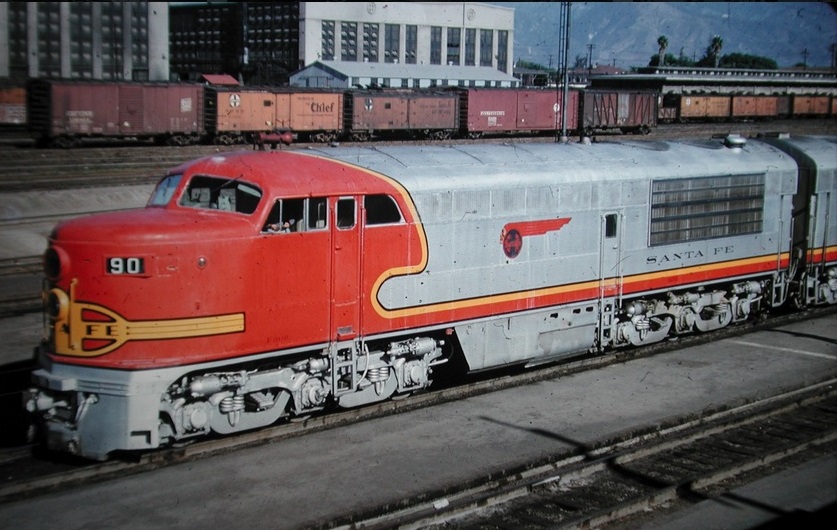
These "Bull Moose" locos were also seen in Victorville and on Cajon Pass during 1947, but after that they were assigned elsewhere on the UP, so I can only run them when I'm operating in 1946 or 1947. I have just one brass model of these locos, made by Sunset Models, and I recently got it painted and lettered as #3555:

Next time we'll choose some other Victorville loco to study.
Turning now to my layout progress since last time, I began by trying to get all the sections to align nicely with each other and with the walls around Section 1, where there should be a 22" wide (narrow) aisle. This involved moving Sections 1 through 8 a little until they were closer to where they should be.
Here's a resulting view looking from Section 3 down toward Sections 2 and 1:

Here's a view looking in the opposite direction, from the corner where the aisle is narrow:

But this first attempt left a 1" misalignment between Section 8 and old Section 9 where it exits the staging room, so I went back and moved every section another inch toward the bookcases you see in the above photo, and that solved the problem, I hope.
Then I worked on cutting a lot of 3x3" plywood squares from a piece of scrap 1/2" plywood, and that produced 80 squares that I could use under the footpads of the 63 existing legs and any extra legs I add later. The purpose is to lift the footpads out from being buried in the carpet, where I can't easily reach in and turn them to adjust the layout height.
I went around lifting up each leg and sliding a square plywood pad under each one, as seen here:

The last step so far has been to cut a couple of 8' long 2x2" boards into six shorter legs that I can attach under the layout to add support to some of the section corners that have no nearby legs and want to sag. Here are the new, short legs, but they have not been added to the layout yet:

My next steps are to attach the short legs under the layout, adjust all the section heights to level them across the layout, and then to bolt them all together.