Sunday, February 26, 2023

UP's Later Challenger Locos in Victorville & Drawing More Staging Control Panels

We've previously covered Union Pacific's early 4-6-6-4 Challenger steam locos, and now it's time to cover the later, more modern ones.  We'll also take a look at some progress in drawing the mainline control panels for the layout's staging deck, and laying down more cork sheets for the yard areas.

The modern Challengers were built during 1942-1944, but those assigned to Cajon Pass were from the #3975-3984 group built in 1943 and converted to fuel oil in 1945.

I'd like to start with a color photo, so I have to use a photo of restored #3985 during an excursion trip in May, 1994.  Herb Iske shot a nice photo of the loco coming through the Upper Narrows of Victorville as it began its climb westward on Cajon Pass:

Note that the modern Challengers can be quickly spotted by the low headlight, rather than having one centered on the smokebox as the early Challengers did.

Returning to the late 1940s now, when these locos were sometimes seen on Cajon Pass (not often), here we see #3975 in Los Angeles in Dec. 1945, as shot by G.M. Best:


At least one of these locos got smoke lifters while in Southern California, as seen on #3977 as it descends eastward through Thorn with a train of empties, on its way to Victorville, thanks to Walt Thrall:


 Here is #3977 with its smoke lifters in LA in Jan. 1946, as shot by G.M. Best:


Fletcher Swan shot #3978 with a westbound freight at Summit in Feb. 1945:


And here is #3978 with an eastbound freight descending through Lugo in 1948 (perhaps early 1948, as this late date is suspect), thanks to Frank Peterson:


G.M. Best shot #3979 in LA in Dec. 1945:


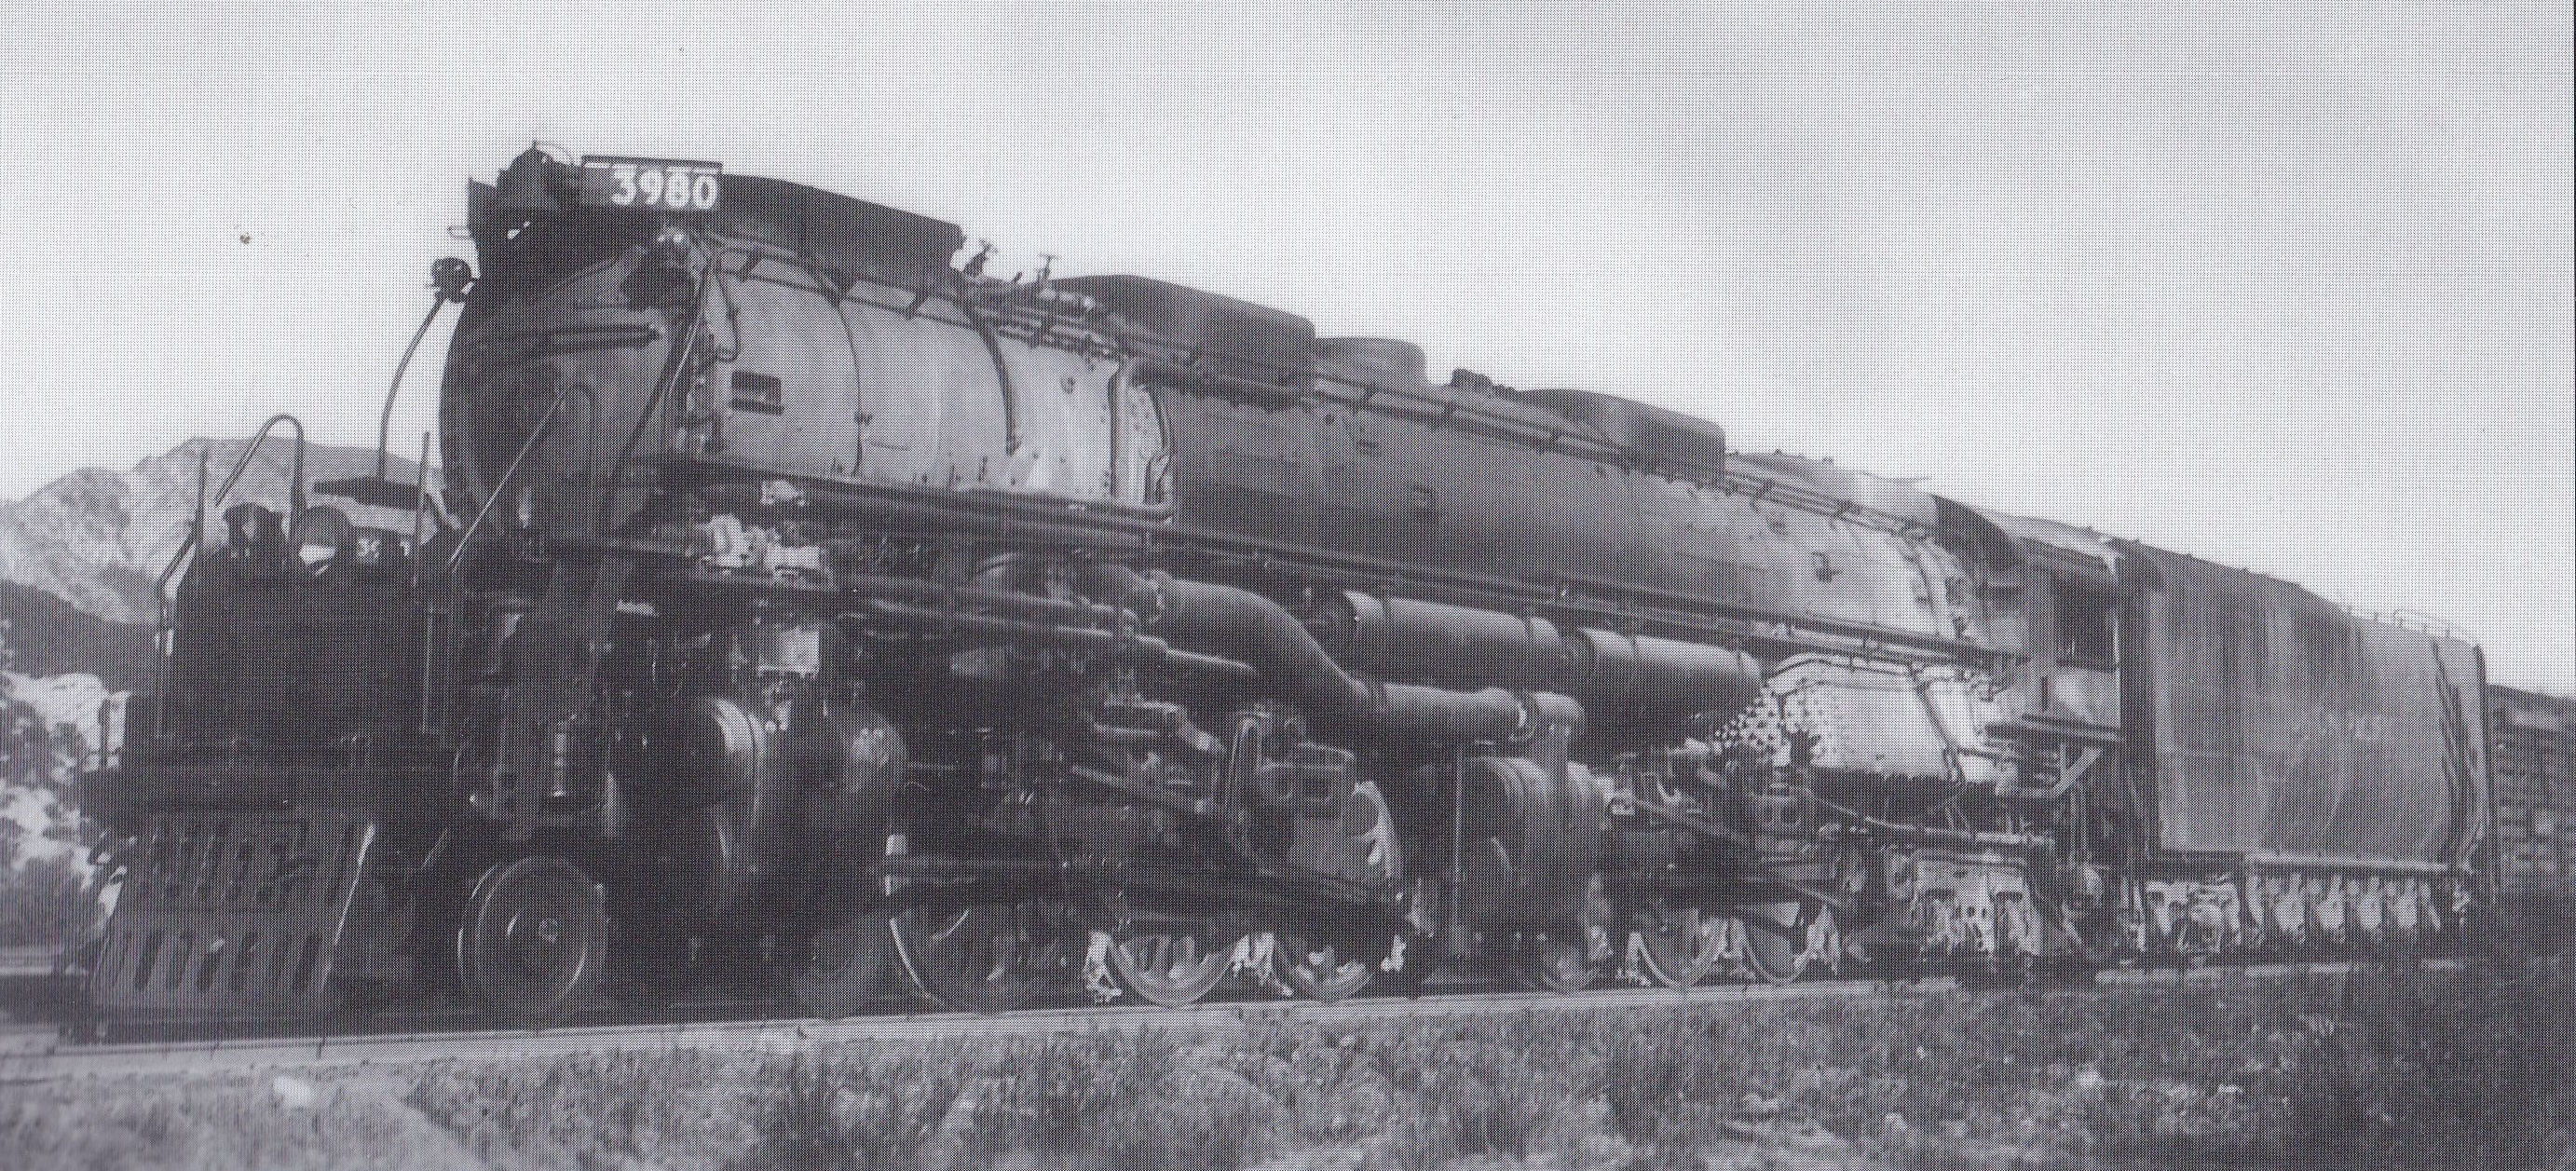
Here is #3980 with a freight at Cajon in April, 1945, thanks to Walt Thrall:


Finally, here is #3981 running late with the 2nd section of the westbound Pony Express below Cajon in August, 1947, as shot by James Ady:


The word is that #3981 and #3984 alternated on the 2nd section of the Pony Express during 1947, but this train normally crossed Cajon Pass at night, so photos of the locos in this service are rare.

These locos were assigned elsewhere by the end of 1947 or early 1948.  And we've never found any photos of the later Challengers in two-tone gray in Southern California.  

Now we'll look at a few sample HO models of these locos.  I have one of the Athearn Genesis late Challengers, as seen here:


Models were also made by Broadway Limited, as seen here:

Key is one of the brass companies that made a model:


I have an ancient Tenshodo brass model, but it has a coal tender, as seen here:


Let's turn now to whatever layout progress I've made in the last two weeks.  Most of the progress was involved with designing more mainline control panels for the lower deck, exchanging many emails with my advisors Tim Fisher and Don Borden.

Don Borden went through several revisions to his CAD drawing of the next mainline panel, which is called the C Tower panel, as some of its tracks lead into the C Yard in staging.  Here is the final result, still using Touch Toggles as the buttons for selecting DC cabs and for throwing powered turnouts:


I also had many email exchanges with Tim Fisher about how many blocks should be in the double-ended A Yard.  I favored one big block, but he finally convinced me that four blocks would be needed to prevent congestion leading into and out of the yard, with the locos moving to and from their stored trains.

As part of this decision, I decided to make a scale drawing of the length of the mainline run of the layout, including the lower deck mainlines, the helix mainlines, and the upper deck mainlines, stretched out straight as a schematic.  Below that I redrew it with the circular routes showing and the estimated train travel times:
 As you can see, the lower deck staging mainline route is 96' long, the helix is 129' long, and the upper mainline loop (helix to helix) is 85' long.  A standard train, based on the passing sidings in Victorville, is 16.7' long, and I've drawn in three such trains, spread out along the route.  There are two pinch points where trains enter and leave the helix, where one train will have to wait for the other train to clear the single track there.
 
On Tuesday morning of this week Bill Messecar visited here again, and we decided to cut and fit and glue down more cork sheets around the far end of the main peninsula.  Bill did the cutting and fitting, while I did the gluing with DAP Alex Plus.  Here is Bill posing with the vacuum by the new cork sheets:

But most of my time this week went into working with Don Borden as he made a CAD drawing of the next mainline control panel, called A-B Tower.  This is a complex area, so I marked up a copy of the peninsula part of the track plan to show how the double-ended A yard is divided into four large blocks.  The darker pencil lines mark the ladder tracks up to the block boundaries:

The four blocks in the A Yard are:

Block AR, which is all the ladder tracks at the lower right end of the yard,
A Yard tracks A1 through A5,
A Yard tracks A6 through A10, and
Block AL, which is all the ladder tracks at the left end of the yard (in the upper part of the drawing).

After a number of revisions, Don Borden completed the CAD drawing for the A-B Tower panel.  The four cab selection lights using Touch Toggles are in a row below each block name, as before:
 
Next we have to tackle the difficult Reversing Tower panel, so we'll see how that goes.

If you can help with anything on my layout, such as building structures, please let me know.
 

Sunday, February 12, 2023

Santa Fe's Freight FT Diesels in Postwar Paint in Victorville & Help with Layout Wiring and Control Panel Design

This time we'll take a look at Santa Fe's freight FT diesels in two of the their postwar paint schemes, and then I'll report on some layout progress in wiring the mainline tracks in staging (thanks to three helpers) and drawing one of the control panels in CAD (thanks to Don Borden).

During World War II the Santa Fe's very large fleet of freight FTs were all painted in a scheme that had red stripes separating the blue from the yellow, all the way along the bodies of the A and B units (we covered those here in Nov. 2021).  But from 1945 to 1948, as the units were gradually repainted, the red stripes were restricted to just the cabs of the A units.  And from 1948 to 1951, during the next repainting, the red stripes were completely eliminated.

Here's a close-up shot by Chard Walker of three-unit FT set #112 by the Victorville depot in the postwar years, showing the paint scheme with the partial red stripes (only on the cab):


In July of 1947 Chard Walker shot FT set #118
(possibly with partial red stripes) coming eastbound through the Upper Narrows of Victorville, while a passenger train heads west on the other track:


Here we see FT set #145 (in partial red stripes) heading west out of Victorville, past the Rainbow Bridge and through the Upper Narrows, thanks again to Chard Walker:


Here's an interesting view of the Victorville wye area that includes two FT sets.  The FT set on the left is #112, which is waiting beside the boiler house for its next helper job.  The FT set on the right is #126 with a westbound freight, which has taken the siding so that the UP passenger train with PAs can pass it.  On the far left is the local switcher, Santa Fe 2-8-2 #3129.  This was shot by Chard Walker in Sep. 1948:


Here we see FT set #120 rounding the curve at Summit with a westbound freight in the late 1940s:


Jack Whitmeyer photographed FT set #143 (in partial red stripes) with an eastbound train of pipe loads at the Cajon depot in Sep. 1949:


Frank Peterson shot FT set #135 with an eastbound freight approaching Summit, with steam helpers on the rear, in the late 1940s:


Here we see FT set #147 (in partial red stripes) with an eastbound GFX train of reefers at Cajon in Nov. 1947, thanks to Stan Kistler (there were also steam helpers on the rear):


We have previously seen this next photo when we were looking at the all-blue experimental FT paint scheme of 1951-52, as seen on FT set #151 on the right at Summit.  But note that FTs were also used as helpers, including rear helpers, as seen here on the left, ahead of the caboose, facing backwards for an easy return to San Bernardino.  This set has no red stripes.  This was shot by Stan Kistler in June of 1952:


Our final shot shows FT set #172 (with no red stripes) as it rounds the curve at Summit with a westbound freight, as shot by Jack Whitmeyer in the early 1950s:


The final shots of FTs on Cajon Pass were taken in 1953, and they were all moved east in 1954, before they got their next paint scheme, with the later "cigar band" on the nose.

I think that all of my HO-scale FTs were made by Stewart, who did all the FT paint schemes.  I can't find any online photos of the Stewart models in the partial red stripes, but here's a brass Hallmark set painted that way:


Here's a Stewart set with no red stripes:


And here's a brass Division Point set with no red stripes, detailed as "Cajon Pass helpers":


Now it's time to report on my layout progress for the last two weeks. 

I had no layout visitors during the first week, but I was busy corresponding with Don Borden (back East) as he used his CAD drawing system to lay out the first sample control panel drawing, starting with the simplest one, Turntable Tower.  This design assumes the use of Touch Toggles for controlling the mainline turnouts and the cab selections for each electrical block (for DC cab control).

We went back and forth every day with new suggestions and changes, and we ended that week at Version 6.  Then I visited a local friend, Larry Sloan, who is using Touch Toggles on his smaller control panels for DCC, as seen here:
 

We then removed some of the excess lettering from our panel design and ended up with Version 7 this week, which will be the example we use for the other mainline panels:
The rows of four lights are for selecting Cab 1, 2, or 3 for each block, or using Cab 0 as an Off button for the block.  The note above the cab lights on the right half of the panel indicate that the A Yard block can also be controlled from the A-B Tower panel on the opposite side of the layout.  I talked with Kevin Hunter of Berrett Hill Shop to verify that his Touch Toggle system can do that.

This week I had two helpers here on Thursday morning and another on Friday morning, all working on aspects of wiring the inner mainline track.

Bill Messecar arrived on Thursday morning and finished soldering all the remaining feeders to the inner mainline track.  Ray Rydberg arrived at the same time and was able to finish adding all the Velcro straps to hold the bus wires all the way around the edges of the layout.  I was clamping down some suitcase connectors along the outer mainline bus wires at the same time.

Here's a photo of Bill doing some soldering while Ray adds Velcro straps:


Then on Friday morning George Chambers arrived to help again.  He brought along a partly-completed model of one of the buildings that makes up the Victorville Lime Rock plant, with some metal corrugated panels attached to the walls. 

He decided he'd like to work on the task of adding the blue and yellow bus wires for the inner mainline, so we worked together on that, unspooling the wires and threading them through the loops in the Velcro straps.  We got most of the way around the layout edges that morning.  Here's a photo of George at work with the two spools of bus wires.


This week I began consulting with Tim Fisher and Don Borden on the design of the next control panel, the Reversing Tower panel, and I phoned Kevin Hunter at Berrett Hill Shop for some advice on how to control the reversing tracks with Touch Toggles, and he will get back to us on that.  In the meantime, we'll work on the other two mainline panels.

Please contact me if you'd like to help in any way.