Sunday, September 19, 2021

UP's 2-8-8-0 Locos in Victorville, and Adding Plywood Pads under Re-Aligned Layout Sections

Our featured locomotive type this time will be UP's 2-8-8-0 "Bull Moose" steam locos, which served as helpers out of Victorville.  Then we'll look at recent progress in moving the layout sections a bit to align them better with each other, and putting plywood squares under the footpads of the layout's legs.

During 1918-1924 the Union Pacific acquired 70 steam locos with a 2-8-8-0 wheel arrangement, and they called them "Bull Moose" locos.  These were initially compound locos, with larger, low-pressure cylinders in the front, and were numbered 3600-3669.  Here's a UP color photo of #3646 on Sherman Hill in the early 1940's:


But during 1937-1944 they were gradually converted to simple 2-8-8-0 locos (with the same-size cylinders front and rear) to improve their speed a little, and they were renumbered 3500-3569 as each was converted.  So by 1946, when my modeled time period begins, they were all simple 2-8-8-0s in the 3500 series.

Some of them worked mainly as helpers on Cajon Pass, so they were commonly seen in Victorville, which was the westward helper base for Cajon Pass.

Here we see a Frank Peterson photo (sorry for the low-res image, but this is in Victorville) of #3555 helping an early 4-6-6-4 Challenger westbound past the water tanks in Victorville with a freight train in 1945:


Here's the same loco waiting as a helper at Summit in 1946:


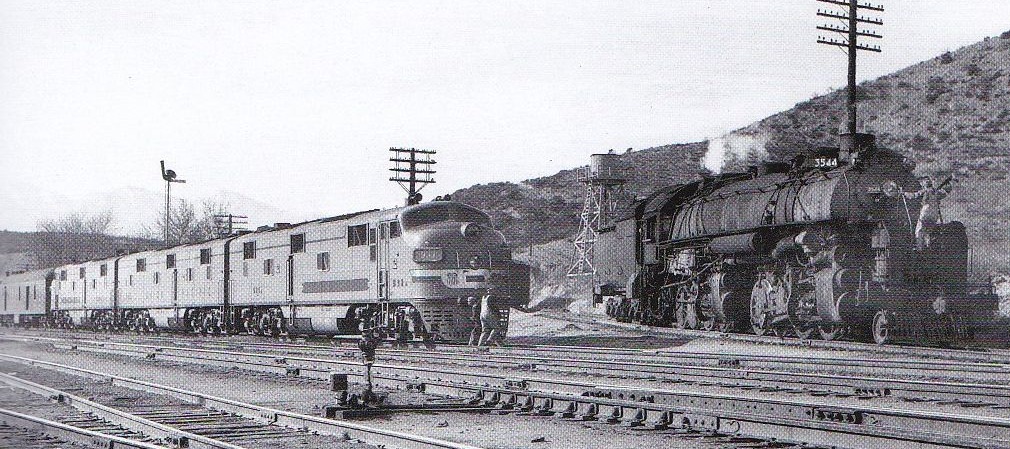
Here we see #3544 at Summit after it has helped a UP set of E7s with an eastbound passenger train in 1946 (another Frank Peterson photo):

Here Frank Peterson is following #3544 as it runs light from Summit down to Victorville in 1946, where it will get another helper assignment:

Finally, here we see a great Donald Duke photo of #3559 as it helps a westbound UP passenger train upgrade out of the Upper Narrows of Victorville in 1945:


These "Bull Moose" locos were also seen in Victorville and on Cajon Pass during 1947, but after that they were assigned elsewhere on the UP, so I can only run them when I'm operating in 1946 or 1947.  I have just one brass model of these locos, made by Sunset Models, and I recently got it painted and lettered as #3555:


Next time we'll choose some other Victorville loco to study.

Turning now to my layout progress since last time, I began by trying to get all the sections to align nicely with each other and with the walls around Section 1, where there should be a 22" wide (narrow) aisle.  This involved moving Sections 1 through 8 a little until they were closer to where they should be.

Here's a resulting view looking from Section 3 down toward Sections 2 and 1:


Here's a view looking in the opposite direction, from the corner where the aisle is narrow:


But this first attempt left a 1" misalignment between Section 8 and old Section 9 where it exits the staging room, so I went back and moved every section another inch toward the bookcases you see in the above photo, and that solved the problem, I hope.

Then I worked on cutting a lot of 3x3" plywood squares from a piece of scrap 1/2" plywood, and that produced 80 squares that I could use under the footpads of the 63 existing legs and any extra legs I add later.  The purpose is to lift the footpads out from being buried in the carpet, where I can't easily reach in and turn them to adjust the layout height.

I went around lifting up each leg and sliding a square plywood pad under each one, as seen here:


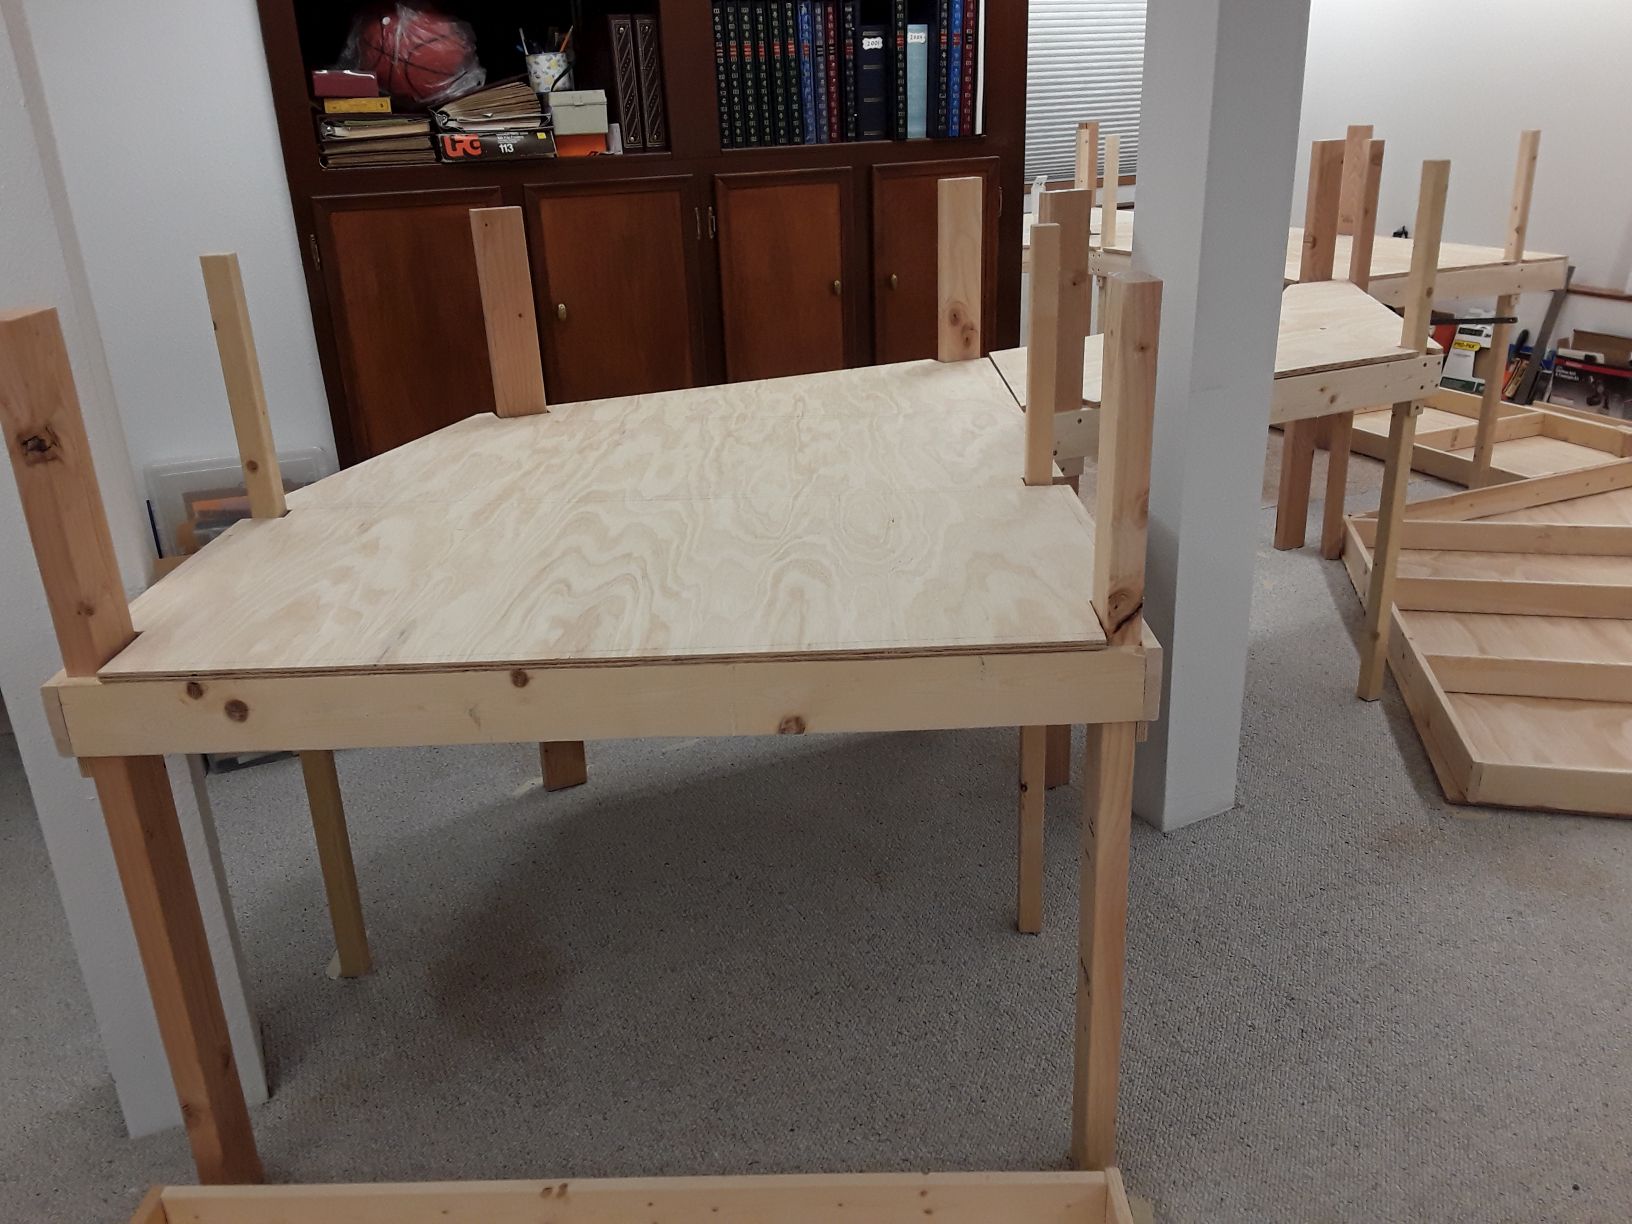
The last step so far has been to cut a couple of 8' long 2x2" boards into six shorter legs that I can attach under the layout to add support to some of the section corners that have no nearby legs and want to sag.  Here are the new, short legs, but they have not been added to the layout yet:


My next steps are to attach the short legs under the layout, adjust all the section heights to level them across the layout, and then to bolt them all together.

Monday, September 6, 2021

Santa Fe's FM Erie-Built Locos in Victorville, and Building Layout Section 1

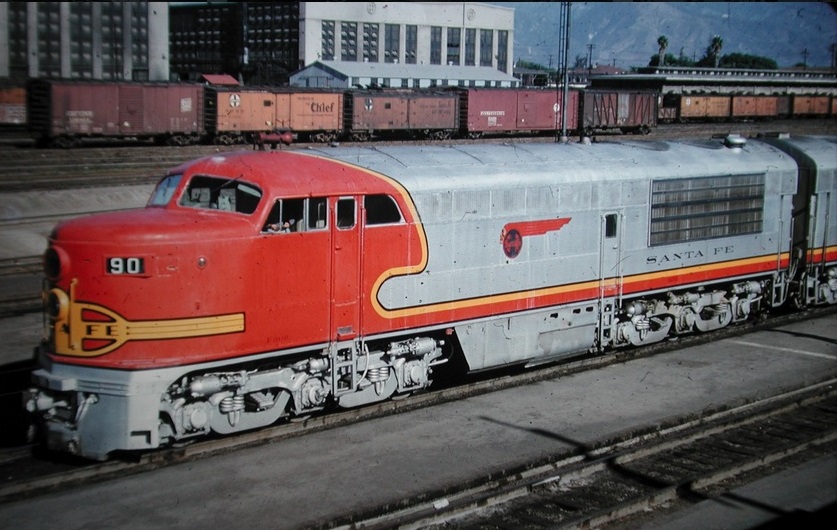
This time I'm starting on a new project for this blog, which is to show the various kinds of locomotives that operated through Victorville during my 1946-1956 time period.  I'll start with an easy one, the Santa Fe's only set of Fairbanks-Morse Erie-Built locos, Number 90 (an A-B-A set, numbered 90LAB).

Then I'll show my progress in putting my final layout section, Section 1, up on legs a week ago.

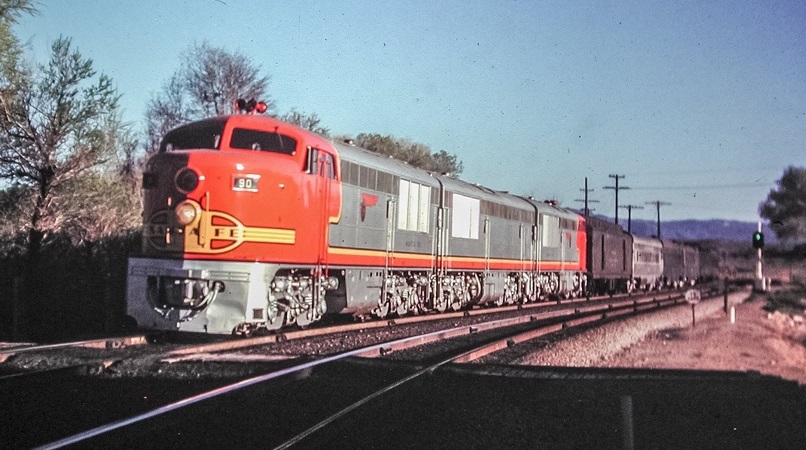
The only photo I have of Erie-Built set #90 at Victorville is this one by Chard Walker in the late 1940s, as the 3-unit loco comes eastbound toward the Upper Narrows and into Victorville with a passenger train:


This set was acquired by the Santa Fe in June of 1947.  Because it was unreliable, it was downgraded from pulling the Super Chief and El Capitan trains in May of 1948.

Here we see #90 in San Bernardino, thanks to Jack Whitmeyer:

In this view we can almost see how the Warbonnet shape curves across the top of the cab roof, but I've never found a photo that clearly shows the shape (is it a curve or a point or a curved point?).

Starting in 1950, the Santa Fe began allowing these Erie-Built units to be mixed into mulitple-unit sets with the Alco PA units, because they used the same electrical systems.  Here's a later view by Jack Whitmeyer of a mixed set running along the California coast to San Diego (one PA and two Eries):


Going back to San Bernardino, here's an up-close view by Jack Whitmeyer:


 And one final view at the San Bernardino depot by Mr. Whitmeyer:


As for HO models of this loco set, Proto 1000 produced both the A and B units in Warbonnet paint:


But the A unit is missing the lower headlight that the Santa Fe's had, and the model used the trucks from their Alco PA model, which are close but not exactly right.  These are things that could be corrected, if wanted.  Various models have been made in brass too, including by Red Ball, Alco Models, and Overland Models.

Turning now to my Victorville layout progress, a week ago I made the seven legs for Section 1, stood the section up on its legs, and attached the legs to the frame, as seen here:


As you can see, Section 1 forms a narrow aisle (about 20" to 22" wide) around the corner of the layout here, and the corner of the frame has been rounded off to prevent scrapes.

The next step was to cut seven notches for legs into the edges of the plywood top and then place it over the frame and legs, as seen here, looking into the corner of the room:


Here's one more view, looking out from the corner, and showing the rest of the layout as it loops around the middle of the basement room:


This past week my only progress was to screw the plywood to the frame, as I was gone traveling for the rest of the week.  My next plan is to move the sections around by about an inch to line them up better with each other.  

Also, I want to try placing some plywood squares or rectangles under the footpads of the legs, so that they won't sink into the carpet where I can't reach in with a pliers to turn them.  I need to adjust all the sections to be level with each other.

Sunday, August 22, 2021

Reviewing My Victorville Layout Track Plans, and Building Layout Section 2

Last time we finished our second visit to the signature scenes in Victorville, so this time I've decided to review what the overall layout track plans look like.  Then we'll look at my progress in putting Section 2 up on legs.  (I was gone for a week, so I only completed one section this time.)

One version of the track plan, which I rejected at the last minute, had just a single level and had an 8-track staging yard along the walls of the staging room (instead of having a helix to a lower deck).  Here's a top view of that plan:

You can see the 8-track staging yard in the staging room at the top of this drawing, where you also see a return loop of several tracks.  Moving to the right out of that room, the double-track mainline curves through the Lower Narrows scene as it follows that inside aisle around a wall of cabinets (the dark gray rectangle).

As the mainline continues to follow that aisle beside the cabinets and toward the red arrow marked as "View 1," some spur tracks branch off into the large cement plant scene there.  At the lower left, the mainline curves around and heads into the Victorville scene near the red arrow marked as "View 2."

Finally, the mainline curves to the left through the Upper Narrows scene near the upper right and heads back to the left, into the big return loop in the staging room.

This layout plan was also put into perspective views by my friend Jim Coady.  The view below shows the cement plant scene as seen from the View 1 arrow, with a curving blue backdrop behind it:


And here is a view of the Victorville side, looking from the View 2 arrow:

You can see the Victorville wye sticking out behind the man standing there.
 
If we could fly up above the basement at this point, here's what we'd see:

Note the steps down to the daylight basement at the top of this view, and the staging room at the upper right.  Victorville and its wye are right in front of us, with the blue backdrop separating us from the cement plant on the far side.

Here's one more view from up above, this time looking at the cement plant side of the layout:

You can see the staging room with its return loop and its yard at the left, and the stairway to the basement at the lower center.  As you enter the basement, you will first encounter the large cement plant scene.  Note the two posts around the railroad's entrance to the cement plant -- they are holding up the house.

This would have been a good-size layout to build, but I was greedy and wanted even more staging tracks, so I added in a lower deck full of staging yards, and a large helix in the staging room to connect the decks and to include even more staging space. 

This is what the current layout plan looks like (showing only the upper deck tracks and the helix):


Everything is the same here, except for the helix (at the top) replacing the 8-track staging yard of the previous plan.  I'm still drawing the details of the lower deck staging yards, so I have no view of that to show you yet.

Now let's look at my progress in putting Section 2 up on legs this past week, after being gone the previous week.  I attached seven legs to the frame, as seen here:


It's not obvious, but two of the 2x2 legs are located in the middle of the section, so that they will be out of the way of the staging yards that have to pass through that area.  Note that Section 3 in the distance does not line up exactly with Section 2, so some of the sections will have to be moved by an inch or so to connect them all together properly.

Here now is Section 2 after its plywood top got five edge notches and two center holes cut into it, so it could be placed over the seven legs, as seen from the middle of the layout:

Note the two legs that come through the middle of the section.  Next week Section 1 will fill that empty space in the distance.

Here's one last view of Section 2, looking in the other direction:

The future Section 1 is on the floor in the foreground.  You can now see the entire loop that the layout makes around the main room in the basement.

During my travels I met with Jim Coady, who showed me the Mojave Northern rock car that he had 3D printed himself, and he gave me this poster he made as a souvenir of our rock car project:


I look forward to completing the lower deck benchwork by next time!


Monday, August 9, 2021

Revisiting George AFB, and Building Layout Sections 4 and 3

This time we'll revisit George Air Force Base (near Victorville), and then we'll look at recent progress on benchwork for layout Sections 4 and 3.

George AFB began as the Victorville Army Flying School during WW2:


Here are some photos of the flight line and control tower, as seen in a yearbook in 1942:

The air base was served by a Santa Fe branch line (the Adelanto Spur) that left the main line at the Lower Narrows and climbed up to the plateau where the air base was located.

In 1947, when the Air Force was formed from the Army Air Force, Chard Walker shot this photo of the Army 45-ton switcher visiting the Victorville depot, where it periodically turned on the wye to equalize the wear on its flanges (because all the curves on the base went in the same direction):

Here's a later USAF GE 80-tonner that may have worked at George AFB:


Here's a 1959 aerial photo of the part of the base where most of the railroad spurs were located:


The rail line enters this photo diagonally from near the lower right corner, then curves north to reach the rows of warehouses you see in the center of the photo.  Just north of the warehouses are the two main hangars along the flight line, where you can see various USAF planes parked.

Here's a more distant view of the south end of the base, just below the previous view, where the oil spur and the bomb spur were located:


The rail line enters this view from the lower right corner, then branches back south to the bomb spur, where the bomb storage buildings can be seen in that same corner of the photo.  Proceeding diagonally to the NW, the rail line passes four jet fuel storage tanks, where there was a spur for unloading tank cars.  At the upper left corner, the line curves north into the warehouse part of the base that we saw in the previous photo.

If I live long enough, I would like to model these parts of George AFB, since I was in the Air Force long ago.  The model would sit on top of the large, rectangular helix that will be located in the layout's staging room, as seen in this drawing by Byron Henderson for my article in Layout Design Journal #68:


The rail line enters the base at the lower left, passes the bomb spur and later the oil spur, and then passes the one-stall engine house and arrives at spurs that serve Base Supply, the rows of warehouses, and the lumber shed and shop.  Note the hangar and control tower beside the runway apron.

Here's a view of some barracks on the base in the 1950s, with two jet fuel tanks in the distance:


Here's a later (2001) stitched-together view of the rows of warehouses served by the railroad, thanks to Gary Gray:


 And here's a view of the back side of the engine house, also by Gary Gray:


 Here's a postcard view of activity on the flight line long ago:


The last time we visited the base in this blog, some people enjoyed seeing actress Barbara Lang posing by a 1957 billboard for a GAFB air show.  So, here she is again, posing by another sign for GAFB:

She was supposed to star in "Jailhouse Rock" with Elvis Presley, but didn't.

This completes our second tour of various scenes from my future layout.

In the last two weeks I've been able to put Section 4 of my layout up on legs, and then Section 3.

I had to build an extension to Section 4 to support the tracks on the inside of the curve coming around the far end of the layout, which I somehow missed doing earlier.  The new triangular addition is called Section 4A.
Here is the frame for Section 4-4A after it was up on legs, standing in front of the previous Section 5.  The notched plywood tops are leaning against Section 5:


Here's a view of Section 4 (on the right) from an opposite angle after the plywood tops were in place:


Then I worked on Section 3.  I decided to add a rectangular outrigger to the frame where I could attach extra legs that could support the point on the upper deck that the fold-down wye tail will be hinged to someday.  Here's the frame for Section 3 after it was up on nine legs:


The new outrigger can be seen in the left distance.  Behind Section 3 is Section 4, and to the right of there is Section 5.

And here is Section 3 from the opposite angle, after the plywood was notched and placed on top:

The extended part of the frame is in the left foreground.  If this were the upper deck, the tail of the Victorville wye would be hinged to this area.

That's all for now.


Sunday, July 25, 2021

Revisiting Victorville's Lower Narrows, and Building Layout Sections 6 and 5

This time we will revisit the scenic Lower Narrows region, which is railroad east of the cement plant, and then we'll look at progress in putting layout Sections 6 and 5 up on legs.

Let's start off with a recent photo of UP's Big Boy steam loco going eastbound through the rocky scenery of the Lower Narrows of the Mojave River:


In contrast, here's a steam era photo of a UP 2-10-2 with a freight heading westbound through the double bridges over the Mojave River:
 

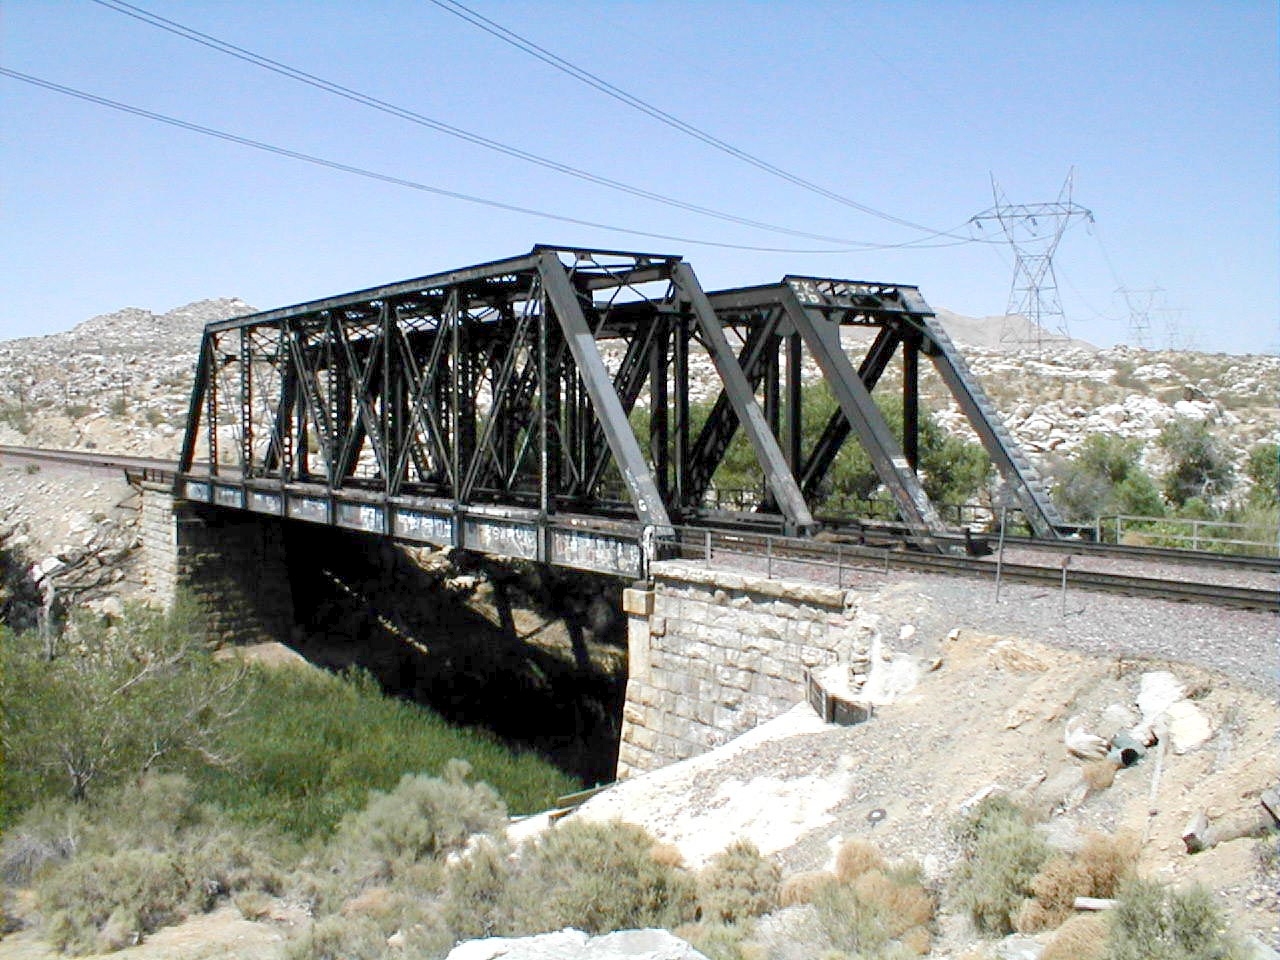
Here's a recent color photo of the double bridges (built in different years, as the railroad was later double-tracked):

Note the power lines coming over the area.  They lead to the nearby electrical switching station, as seen here beside Route 66:


 Here's the 1956 USGS map of this area:

Note the Substation building near the lower center of the map, and the double tracks of the Santa Fe Railroad crossing the river (on two bridges) near the BM 2692 mark, and the cliffs beside the tracks as they curve past the Lower Narrows label.  Note that the solid red highway going past the Substation is Route 66.

The curvy track separating from the mainlines behind the Substation and running to the left is the branch line to George Air Force Base, which we will revisit next time.  

In the notch between the George AFB track and Route 66 are two squares, which mark the location of Rosso's Texaco gas station and cafe, as seen here:

I plan to include all these things in my Lower Narrows scene, as shown in this track plan:

The double bridges over the Mojave River are in the center of this scene, with rocky cliffs behind the tracks hiding the Mojave Northern track as it sneaks through this area unseen.  The Electrical Switching Station is to the lower right of the bridges, and the Texaco gas and cafe buildings are near the left edge of the scene.

One famous building just railroad west of here that I'm not including is Emma Jean's Holland Burger Cafe, as it's on the wrong side of the highway (in the aisle), and sadly there's no room for it:

It's still there as a Route 66 landmark, and I enjoyed eating lunch there once and buying a souvenir shirt.  My substitute is Rosso's Texaco and cafe, which does fit nicely, and which my friend Jack Dykstra used to visit as a child.

Let's close our visit with one more look at those wonderful, rocky cliffs, as a Santa Fe freight heads westbound beside the river, toward the double bridges:


Turning now to progress on my layout, I'm in a routine in which I can get another lower deck layout section up onto legs each week.  

This involves planning where the legs should go, building the needed number of legs from 2x4s and 2x2s, marking where the notches for the legs should go along the edges of the plywood tabletop, cutting out the notches with a saber saw outdoors, clamping a few of the legs to the frame, standing the frame up on these legs, clamping on more legs, attaching the legs to the frame with screws, adjusting the footpads until the frame is level, placing the plywood tabletop onto the frame, with the legs fitting through the notches, and screwing down the plywood to the frame (using about two dozen screws, spaced about 12" apart).

Here's a photo of new Sections 6 and 6A after the plywood was added on top:


Here's a photo of me on my knees, screwing the legs into the frame of adjacent Section 5:


And here's a different view of Section 5, now with its plywood on top, as seen from the entrance to the daylight basement:


Meanwhile, my friends Bill Messecar and Don Hubbard have completed building my fleet of 14 Mojave Northern rock cars (thanks to rock bins created by Jim Coady), with six of the cars having limestone loads.  I posed them with a stand-in 0-6-0T steam loco on my first staging tracks on Section 9:


That's all the news for now.  Sections 4 and 3 are next.